
£0
DELUTS UNIVERSE OFX FOR DAVINCI RESOLVE STUDIO
DELUTS UNIVERSE OFX v1.8
FOR DAVINCI RESOLVE STUDIO / MAC
OpenFX plugins for DaVinci Resolve Studio. macOS (Metal) now. Windows CUDA is planned.
Demo versions are available below. The picture is the real picture. A green watermark sits on the frame until you activate with a serial key.
IN THIS PACK
• DELUTS EMULSION v3.3 — The negative and the print, now wide gamut from end to end. Twenty-five stocks, three print stocks, physical grain and halation, and the lab controls colourists actually use. Guide below.
• DELUTS FILM GATE II v1.1 — A real film gate, from Standard 8 to IMAX 15-perf. Perfs, pitch, optical sound, Kodachrome slide mount.
• DELUTS LENS SIMULATOR v1.1 — Six real lens prescriptions, traced. Coma, astigmatism, field curvature and bokeh from the glass, not painted on.
• DELUTS LENS WHACKING SET A v2.2 — Real in-camera flare plates, composited as if you are looking through the glass.
• DELUTS FILM DUST v1.2 — Scanned dust, hair and scratches.
• DELUTS DIGITAL MIST v1.0 — A physical Black / Gold Pro-Mist: glass with particulate, not an edge glow.
• DELUTS MAGAZINE PRINT v1.1 — A CMYK magazine print. Full screen, or the print colour alone.
• DELUTS CLARITY v1.0 — End-of-chain Texture, Clarity, Dehaze, Vibrance.
• DELUTS STACCATO v1.0 — Held-frame cadence. The look of dropping 25 fps into 12.5 and playing it back.
• DELUTS SCREEN LABELS v1.0 — CRT-style labels for looks and grades. Free. No serial.
You can buy EMULSION on its own, or take the bundle.
WHAT YOU NEED
These are OpenFX plugins. DaVinci Resolve Studio is required. The free version of DaVinci Resolve does not load third-party OFX plugins.
• Host — DaVinci Resolve Studio (the paid version)
• Platform — macOS (Metal)
• Tested on — DaVinci Resolve Studio 21.1, macOS 15.6
• Licence — serial under LICENSE in the plugin. Until you activate, each plugin (except Screen Labels) runs as a demo with a watermark. A single-product serial unlocks that plugin. A bundle serial unlocks the whole DELUTS set.
INSTALL
1. Quit DaVinci Resolve.
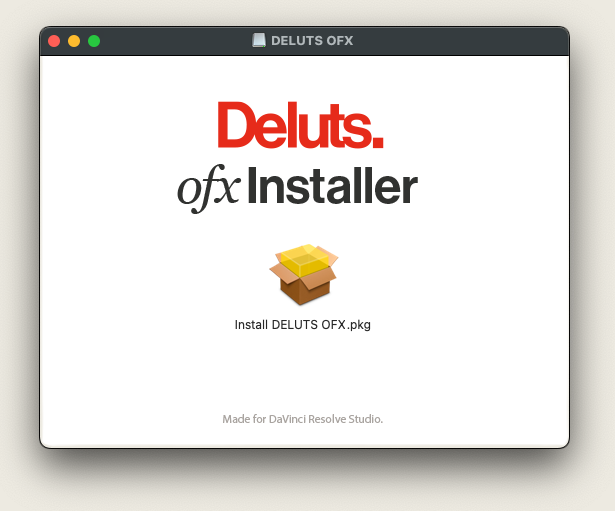
2. Download the selected product and open the disk image DELUTS_OFX_v1.8.dmg.
3. Double-click Install DELUTS OFX v1.8.pkg. The process is guided. Everything is ticked already, so Install gives you the whole bundle. Use Customise to pick a single product.
4. Relaunch Resolve after installation.
Plugins install to /Library/OFX/Plugins/
Starter presets install to ~/Library/Application Support/DELUTS/Presets/
Film stock LUTs install to Resolve’s LUT folder, under DELUTS_STOCK.
Stock and presets always install, even if you uncheck some plugins. Both stay writable, so you can add your own .cube, .tin and .wav files, and your own .json presets.
LICENCE
Paste your serial under LICENSE at the bottom of the plugin panel and click Activate. A product serial unlocks that plugin on this machine. A bundle serial unlocks every DELUTS plugin. Deactivate removes the key so you can move it.
SCREEN LABELS is free and needs no serial.
DELUTS EMULSION v3.3 — USER GUIDE
A film negative and print, computed for every pixel, inside DaVinci Resolve.
Most film looks are a LUT: a baked colour recipe that never changes. EMULSION is the film itself. Light from your camera exposes a real negative stock. That negative is printed, scanned, or sent through Technicolor. Exposure, colour, grain and glow all come from the stock — so the picture responds the way film does.
DELUTS has been building colour tools for DaVinci Resolve since 2015. EMULSION is the centre of the set: twenty-five negative stocks, three print stocks, physical grain and halation, and the lab controls colourists actually use.
This guide is for anyone considering EMULSION, and for anyone already grading with it. If you are on the free version of DaVinci Resolve, it also explains why Studio is the step that unlocks these tools.
NEW IN v3.3
• Wide gamut, end to end. The film takes every colour your camera recorded, the grade tools work on the film’s full colour, and nothing is clipped to Rec.709 along the way. Deliver in DaVinci Wide Gamut, P3 or Rec.2020 and you get all of it; deliver in Rec.709 and it is rolled in smoothly at the very end.
• Grade tools rebuilt for wide gamut. SATURATION, SKIN SATURATION, the COLOUR MIXER, HIGHLIGHTS | MIDS | SHADOWS, FUJITONE and KODATONE now hold hue and brightness, and “skin” or “blue” mean the same thing on any camera.
• Cleaner blues and purples. Inter-image still deepens colour, but no longer bends bright blues and violets toward purple. A bright sky stays blue, and yellows, greens and skin keep the stock’s own colour.
• HIGHLIGHT LATITUDE. Sunlit exteriors keep their highlight detail instead of going flat and “cooked” — close to RED IPP2’s very soft roll-off, while still a film print.
• CLIPPED HIGHLIGHTS. Eases clipped camera highlights toward white before the film, the way a camera’s highlight reconstruction does.
• No dark hole in deep blues. The saturated blues of wide-gamut cameras and LED lights now roll smoothly into deep blue instead of dropping to black.
• Smoother 3-STRIP SATURATION, with no hard edges on gradients or skies.
• OUTPUT always applies, whatever FINISH TOOLS is set to.
WHY THIS IS NOT A LUT
A LUT maps one colour to another. It cannot over-expose. It cannot grain more in the shadows than in the highlights. It cannot print a Vision3 negative onto 2383 one day and scan it the next.
EMULSION starts from scene light:
1. Your footage is decoded into the light the camera saw.
2. That light exposes the three colour layers of a real stock, each through its own spectral sensitivity.
3. The layers develop on that stock’s characteristic curves, and they influence each other the way real film does — the inter-image effect that gives film its clean, separated colour.
4. Dye forms. The negative is printed, scanned, or printed the Technicolor way.
5. You get a finished picture.
What that means on a real shot:
• Exposure behaves like film. Over-expose and the negative gets denser and richer. Under-expose and it drops into the toe, thin and grainy. That is not the same as turning up gain.
• Each stock is measured data. Changing stock changes colour, contrast, grain and halation together, because they all come from that stock’s data sheet.
• The print is a separate step. As in a lab, the negative and the print each have their own controls. Most of the classic film looks come from how those two interact.
The grade, the texture and the delivery all live in one node.
WHO IT IS FOR
• Colourists and filmmakers who want film that responds, not a look that sits on top.
• Resolve Studio users who want the whole lab in one place: stock, print, printer lights, push/pull, bleach bypass, grain, halation.
• Anyone on free DaVinci Resolve who is deciding whether Studio is worth it. Third-party OpenFX plugins are a Studio feature. EMULSION is one of the reasons to make that step.
HOW THE PICTURE FLOWS
Knowing the order explains nearly everything about how the controls behave.
1. Your footage
2. Export bias (optional)
3. Input — gamut / gamma: what the footage is
4. Before the film — exposure, scene light, roll-off / recovery, clipped highlights, film density
5. The negative — film stock, inter-image, push / pull, the dyes, halation, edge effect, grain
6. The print / scan — medium, print stock, print exposure, contrast, toe, highlight latitude, balance, temperature / tint, punch, dye fade, bleach bypass, print flare, creative
7. Grading — wide gamut: saturation, skin saturation, sauce, highlights | mids | shadows, colour mixer, saturation tools
8. Finish tools — final exposure / contrast / saturation / gamma / lift
9. Intercolour — an optional LUT, in Rec.709 gamma 2.4 (colour beyond Rec.709 is carried round it)
10. Output — converted to what you are delivering; the one place colour is rolled off, at the edge of that space
11. Fade — mixes the whole result with your footage
The key idea: the film works in scene light, and takes any colour your camera recorded — including the deep blues of a wide-gamut camera or an LED light. Then you grade the print, and the grade tools are built for wide gamut too: nothing is clipped to Rec.709 along the way. OUTPUT is the last convert, and the only place colour is rolled off — at the edge of the space you deliver in. Deliver in DaVinci Wide Gamut, P3 or Rec.2020 and you get all of the film’s colour; deliver in Rec.709 and it is rolled in smoothly at the very end.
A few controls sit where you will reach for them, not where they fire in the chain:
• TEMPERATURE / TINT sit in TECHNICAL, and drive the printer lamp.
• FILM DENSITY sits with the print controls, and feeds colour into the film.
• EXPORT BIAS sits next to OUTPUT, because that is where you use it when baking a LUT. It still fires at the top of the chain, on the incoming footage, so the floor and ceiling bake into the LUT.
QUICK START
1. INPUT. Set GAMUT and GAMMA to exactly what your footage is — ARRI Wide Gamut 4 / ARRI LogC4, Sony S-Gamut3.Cine / S-Log3, DaVinci Wide Gamut / DaVinci Intermediate, and so on.
2. THE FILM. Choose a FILM FAMILY, then a FILM STOCK. The default is Fujifilm Reala 500D: warm, colourful, a good first look.
3. TECHNICAL. Use EXPOSURE (STOPS) to place the shot on the film. Leave SCENE LIGHT on Daylight unless you are on TECHNICOLOR 3-STRIP — that is where it is the light on set — or matching a bake.
4. THE PRINT / THE SCAN. Leave MEDIUM on PRINT for the classic projected look. Set brightness with PRINT EXPOSURE and colour with BALANCE RED / GREEN / BLUE.
5. Look at it. If it feels flat, add PUNCH. If you want more texture, turn up GRAIN and HALATION.
6. OUTPUT. Leave it on Rec.709 Gamma 2.4 for a normal SDR timeline. On a DaVinci Wide Gamut timeline, set it to DaVinci Intermediate so the film’s full colour reaches the timeline.
That is a complete film grade. Everything else is refinement.
SETTING UP IN RESOLVE
Where to put it. EMULSION produces a finished display picture, just as a print is finished. Put it at the end of your node tree, and set OUTPUT to what you are delivering. Do not put a second display transform or film LUT after it. That would render an already-rendered picture, and it usually comes out dark and crunchy.
Balance before it, not after. Corrections before EMULSION (in log or linear) feed the film, the way lighting and filters feed a camera. Corrections after EMULSION grade the print. Both are valid; they feel different.
Colour-managed projects. If the timeline is DaVinci Wide Gamut / DaVinci Intermediate, set INPUT to those two (the default), and OUTPUT to DaVinci Intermediate.
Grading in DaVinci Wide Gamut. With INPUT and OUTPUT both on DaVinci Wide Gamut / DaVinci Intermediate, nodes before EMULSION grade in DWG and feed the film; nodes after it grade the print in DWG, with every colour the film made still there.
Test charts and stills. INPUT describes the pixels EMULSION receives, not the file you imported. On a colour-managed timeline Resolve converts a still for you, so the defaults are right. On an unmanaged timeline, a Rec.709 or sRGB chart (a hue board, a ColorChecker image) arrives as it is — set INPUT GAMUT and GAMMA to REC.709. Left on DaVinci Intermediate, the chart’s white is read as about nine stops over, the film burns out and saturated blues turn pink. That is the film doing its job with the wrong input, not a fault.
Blackmagic Gen 6 RAW. In Camera RAW, decode to DaVinci Wide Gamut / DaVinci Intermediate, then use those same two settings in EMULSION.
Performance. Halation and grain are the two expensive stages. Both have on/off switches at the top of the panel, so you can turn them off for playback and back on for the render. The RENDER readout at the bottom of the panel shows how long the last frame took on the GPU.
Trying before you buy. Until a serial is activated, EMULSION runs as a demo with a watermark. The picture is the real picture. Activate under LICENSE when you are ready.
THE CONTROLS
GLOBAL
VIEW lets you see different stages of the process.
• FINAL — The finished picture.
• THE NEGATIVE — The negative as a scanner reads it: orange mask and all. Useful for seeing what exposure is doing to the film.
• BYPASS (CST ONLY) — Only the input and output colour conversions, no film. A technical check. Highlights clip hard because nothing rolls them off.
• BYPASS + DISPLAY ROLL-OFF — The same conversions, with a gentle shoulder into white. Your footage “straight”, for comparison.
• HALATION ONLY — Just the glow the film adds.
CST BYPASS skips the input and output colour conversions. Use it only when baking a LUT into a colour-managed pipeline of your own. Leave it off for normal grading.
HALATION / GRAIN are the same switches as in HALATION AND GRAIN, repeated at the top so you can kill them for playback.
FADE mixes the whole plugin in and out. At 1.0 you get the full EMULSION picture. At 0 you get your footage with no film, still correctly converted from your camera space to your output. In between is a dissolve. It is a quick way to dial a look back, and it bakes into exported LUTs.
PRESET LOOKS
Looks are complete starting points. Picking one sets the controls on screen, so you can see exactly what it did and take it apart. Prev / Next step through them.
To add your own, drop .look files into the PRESET_LOOKS folder and press Refresh Looks, or save them from PRESETS at the bottom of the panel.
INPUT
GAMUT and GAMMA tell EMULSION what your footage is. This is the most important setting in the plugin. The film model needs true scene light, and it can only get that if it knows how your camera encoded it. If these are wrong, every stock will look wrong.
• Choose the camera’s own log or wide-gamut space where you can. The list covers ARRI, RED, Sony, Canon, Blackmagic, Panasonic, DJI, Fuji, GoPro, Apple, Nikon, Leica, Z CAM, Insta360, ACES, and the usual display spaces.
• Rec.709 means display footage (a pure 2.4 power). It works, but display footage has no highlight information above white, so the negative never reaches its natural shoulder. Log footage looks much better through film.
TECHNICAL
This section is the light and the camera — and five roll-off / recovery tools that shape your footage before the film sees it.
EXPOSURE (STOPS) is the light meter. It changes how much light reaches the negative, and the film responds the way the real stock would.
• Over-expose (+) — a denser negative. Printed back down with PRINT EXPOSURE this gives richer colour, finer grain and a softer highlight roll. Many cinematographers over-expose negative by a third to one stop on purpose.
• Under-expose (−) — a thin negative. Shadows fall into the toe; blacks go weak and grainy.
Use EXPOSURE to decide how the film treats the shot. Use PRINT EXPOSURE to set how bright the final picture is.
SCENE LIGHT is Daylight 5500K, Daylight 6500K or Tungsten 3200K.
On PRINT, SCAN and TECHNICOLOR it is the bake reference, not a lighting filter. Digital footage is already white-balanced, and the print is re-timed per illuminant so 18% grey stays grey. On FINAL you will see only a small residual — the crossover. THE NEGATIVE view shows the real layer imbalance (a T stock under daylight: blue dense, red thin). The colour cast people mean by “shot tungsten in daylight” comes from choosing a T stock, not from this menu.
On TECHNICOLOR 3-STRIP it comes into its own. That medium is a three-strip camera, not a colour negative, so there is no printer pack to cancel the taking light. SCENE LIGHT is then the light on set. Daylight and tungsten really change the colour — tungsten goes warm.
TEMPERATURE / TINT are the printer lamp: warmer/cooler and magenta/green, the way a lab timer changes the pack. They sit here, but they act on the print, on top of BALANCE.
CLIPPED HIGHLIGHTS eases the brightest parts of your footage toward white before the film sees them, the way a camera’s highlight reconstruction does. Where a camera clips — a sky, a window, a practical — the highlight can carry a pink or magenta cast, and a wide camera gamut exaggerates it. 0 is off (the default); around 0.5 starts at about scene white. BYPASS (CST ONLY) still shows your footage without it.
Roll-off and recovery
Five tools for the very top and bottom of the picture. The film’s own toe and shoulder already give a beautiful roll-off; these let you fine-tune it. All five work on your footage before the film, as they did in the original EMULSION DCTL, so the film still renders what they shape: recovered shadows keep their contrast and blacks stay black, and rolled-off highlights keep their detail instead of greying down. For highlight detail on a bright exterior, HIGHLIGHT LATITUDE in THE PRINT works alongside them.
• HIGHLIGHT ROLL-OFF — Rolls the footage’s highlights off before the film. Move it left for a softer, longer highlight that still keeps its detail.
• SHADOW ROLL-OFF — Eases the deepest shadows of your footage up out of black before the film, so dark detail reaches the negative. Heavy settings lift true black a little.
• HIGHLIGHT RECOVERY — Reshapes the top of the footage before the film: positive brings hot highlights up toward a soft top, negative pushes them down.
• HIGHLIGHT CLEAN — Highlight contrast of the footage, before the film. Left for calmer, cleaner brights; right for more sparkle.
• SHADOW RECOVERY — Opens (+) or deepens (−) the shadows of your footage below a pivot, before the film, leaving the mid-tones where they are. The film’s toe still shapes them, so they come up with detail rather than going milky.
THE FILM
FILM FAMILY chooses the group. FILM STOCK lists the stocks in that family. The default is Fujifilm Reala 500D.
• MOTION PICTURE — Kodak Vision3 50D 5203, 250D 5207, 200T 5213, 500T 5219 · Cinelook 800T · Fujifilm F-64D, Eterna 250D, Reala 500D, Eterna Vivid 160T, Eterna 250T, Eterna 400T, Eterna 500T
• KODAK STILL — Ektar 100, Portra 160, Portra 400, Portra 800, Gold 200, UltraMax 400
• FUJI STILL — Superia X-TRA 400, Pro 400H
• AGFA STILL — Vista 100, Vista 200, Vista 400, Vista 800, Ultra 100
Every stock is built from the manufacturer’s published data: spectral sensitivities, characteristic curves, dye spectra, base density and granularity. The core stocks — Vision3 5203, Ektar 100, Portra 400, Superia 400, Eterna 250D and Agfa Vista 200 — are also calibrated against real negatives of a colour chart, shot on that film and scanned. Every other stock inherits that calibration from its closest sibling, so the whole range shares the same measured colour behaviour.
A few notes:
• T stocks (5213, 5219, the Eterna T family, Vivid 160T, Cinelook 800T) are balanced for tungsten. On a colour negative their colour is in the stock, not in the SCENE LIGHT menu. SCENE LIGHT does not give you an 85-filter / no-85 look on PRINT or SCAN. On TECHNICOLOR 3-STRIP there is no colour stock — this menu is the light.
• Cinelook 800T is Vision3 500T with the anti-halation backing removed, as it is sold for stills. Big, glowing halation around every light — night work.
• Pro 400H is Fuji’s portrait stock: soft, pastel, flattering on skin.
• Eterna Vivid 160T is the saturated member of the Eterna family.
• Reala 500D is rich, natural daylight colour with a warm palette.
• Agfa Vista and Ultra are the much-missed consumer range. Punchy and warm, with vivid reds, magentas that lean toward scarlet, rich golden yellows, and a little more contrast than Portra. Vista 200 is calibrated to a real scanned negative. Ultra 100 is the finest-grained of the family.
INTER-IMAGE is how strongly the colour layers influence each other in development. That interaction is a large part of why film colour looks clean and separated. 1.0 is the real film. 0 removes it and looks noticeably duller. Above 1 gives more colour purity than the chemists intended. Leave it at 1 unless you have a reason.
Inter-image deepens colour. In the raw data it also bends bright blues and violets toward purple; EMULSION holds the hue of blues, violets and purples, so a bright sky stays blue, and leaves yellows, greens and skin with the stock’s own inter-image colour.
EDGE EFFECT is film’s natural sharpening. As each layer develops, chemicals spread a tiny distance sideways, so edges gain a thin light/dark outline. It does nothing on flat areas. 0 is off; 1.0 is the physical amount.
EDGE DIFFUSION is how wide that effect is, in microns on the film. Smaller gives a finer, crisper edge; larger sharpens bigger shapes. 12 microns is the data-sheet figure. It only works when EDGE EFFECT is above 0.
THE PRINT / THE SCAN
This is where the negative becomes a picture. Most day-to-day adjustments happen here.
MEDIUM
• PRINT. The negative is printed onto print film and projected. Deep blacks, the classic cinema look.
• SCAN. The negative is scanned and inverted, the way a lab scans still film. Softer and more neutral.
• TECHNICOLOR. A dye-transfer print: your negative separated into three records, each printed with one pure imbibition dye. The same tone and grey balance as the print, with that famously rich colour — emerald greens, deep skies, glowing skin.
• TECHNICOLOR 3-STRIP. The three-strip camera of Hollywood’s golden age. The scene is split by a prism into three black-and-white separations, masked and printed by dye transfer: ruby reds, emerald greens, the most vivid colour cinema ever made. In this mode FILM STOCK sets only the grain and halation, because three-strip had no colour negative. SCENE LIGHT is the taking light of the camera — that is where this menu comes into its own.
TECHNICOLOR KEY (both Technicolor media) is the black-and-white key image classic prints carried under their dyes. Raise it for deeper blacks and a denser, more sculpted picture.
PRINT STOCK (PRINT medium)
• Kodak Vision 2383 — the everyday release print. The classic.
• Kodak Vision Premier 2393 — a premium print: deeper blacks, purer colour.
• Fujifilm Eterna-CP 3521XD — Fuji’s cinema print. Softer and gentler, with its own character.
PRINT EXPOSURE is the brightness of the picture, in stops. On a print this is the printer light, and it is the correct way to make a film picture brighter or darker once the negative is exposed.
PRINT CONTRAST is a harder or softer print, pivoting on grey. On SCAN it sets the contrast of the inversion.
PRINT TOE (PRINT only) shapes the very bottom of the print curve. A saturated colour — a red coat — sits on the toe in one layer and can block up into flat colour. Positive values open those colours up again; negative values compress them. Mid-tones and grey do not move.
HIGHLIGHT LATITUDE is how much highlight detail the print keeps. A negative holds eight stops and more above grey, but a print runs out of density near white, so on a sunny exterior the stone, a white shirt or a sky can go flat and “cooked”. HIGHLIGHT LATITUDE gives the negative a softer shoulder — the lab’s route to more latitude — so highlights come down a touch and keep separating right up to the brightest parts of the frame. 1 (the default) sits close to RED IPP2’s very soft roll-off; 0 is the print as it comes; up to 1.5 for softer still. Mid-tones and shadows do not move.
PUSH / PULL is lab processing. Pushed film is developed longer: contrast and fog rise, shadows thin. Gritty and punchy. Pulled film is softer. The effect shows in THE NEGATIVE view too.
PUNCH is a more graded version of the stock: more contrast and more colour together, for when the film looks too flat or too faithful. Greys stay grey and skin stays skin. 0 leaves the stock exactly as it is. This is often the one control that turns “accurate” into “graded”.
FILM DENSITY is a saturation curve on the footage before the film sees it. Positive enriches the quieter colours going in; negative calms them. Greys and already-saturated colours stay put.
DYE FADE (PRINT and TECHNICOLOR) is an old print. Cyan fades first, then magenta; yellow hardly fades. The picture drifts warm, and the blacks lose density.
BLEACH BYPASS (PRINT and TECHNICOLOR) leaves the silver in the print alongside the dye. Darker, harder, muted — the classic bleach-bypass look.
PRINT FLARE is stray light in the projector, which lifts the blacks softly. Real projection sits around 0.005 to 0.03.
BALANCE RED / GREEN / BLUE is the printer’s filter pack. Each slider adds or removes one colour through the whole range, the way printer lights do.
SATURATION is overall colour intensity on the finished picture. Hue and brightness hold as you move it, on every colour including those beyond Rec.709.
SKIN SATURATION is saturation on skin tones only — light to dark skin, picked by hue — calm or warm faces without touching everything else.
THE DYES
These change the dyes of the negative itself: what colours the film is made of. Small moves go a long way.
• CYAN / MAGENTA / YELLOW SHIFT slides each dye along the spectrum, which changes the hue of everything that dye contributes to.
• CYAN / MAGENTA / YELLOW STRENGTH is how much of each dye the negative forms.
• DYE WIDTH. Broader dyes give muddier, older-looking colour. Narrower dyes give purer, more modern colour.
CREATIVE
Look controls on the positive, part of the print stage.
• 3-STRIP SATURATION brings up the quieter colours before the loud ones, for dense, full colour without neon. Right for more; left mutes the quiet colours.
• CAST RED / GREEN / BLUE puts a colour into the highlights and takes it out of the shadows, like an off-balance print.
• HIGHLIGHT COLOUR is a soft shift in the bright end only: cyan one way, magenta the other.
SAUCE
Classic film and process looks, one slider each, all blendable. ENABLE turns the whole section off without losing your settings.
• FUJITONE — Fuji-like colour: cooler greens, restrained reds, a little S-contrast
• KODATONE — Kodak-like colour: warmer yellows and reds, milder contrast
• CHROME — Ektachrome-style slide: denser mid-tones, cooler shadows, bleached whites
• TWOTONE — Early two-colour film: the blue record replaced by green
• AEROIR — Aerochrome-style infrared: foliage goes red and magenta, skies stay cyan
• TURQUOISE — LomoChrome Turquoise-style: blues go amber, greens teal
• VINTAGE — A faded, slightly cross-processed print
• EXPIRED — Expired stock: lower contrast, green lift, lifted blacks
BUILT FOR WIDE GAMUT
Every grade tool in EMULSION works on the film’s full colour, not a Rec.709 copy of it.
• Colour tools — SATURATION, SKIN SATURATION, SATURATION COMPRESSION, the COLOUR MIXER’s colour picking, FUJITONE and KODATONE, MONOCHROME — work in a perceptual colour space, so hue and brightness hold and “skin” or “blue” mean the same whatever camera the picture came from.
• Per-channel tools — the mixer’s colour adds and 3×3, HIGHLIGHTS | MIDS | SHADOWS — work on Rec.2020 channels: wide enough for the film’s colour, with real primaries, so a push never makes an impossible colour.
• A final guard keeps every colour real, so no slider can turn a saturated blue black.
• CHROME, TWOTONE, AEROIR, TURQUOISE, VINTAGE and EXPIRED are classic Rec.709 recipes. They act on the Rec.709 part of each colour, and the rest is carried round them.
HIGHLIGHTS | MIDS | SHADOWS
Nine sliders that shape red, green and blue separately in the highlights, mid-tones and shadows. They work like colour-balancing trackballs, per channel. Right is always more of that colour; left is less.
• HIGHLIGHTS. More or less of that colour in the bright areas, up to a stop at full.
• MID-TONES. The same through the mids.
• SHAD-TONES. Right lifts a toe of that colour into the shadows — use it to warm or tint the blacks. Left takes it out.
The three bands come from perceived lightness and blend smoothly into each other, so there is no line where one band stops and the next starts.
ENABLE turns them all off without losing your settings.
COLOUR MIXER
Secondary colour work without keys or windows.
• Hue adds (BLUE-R … YELLOW-B). For each of six colour families — blue, green, red, cyan, magenta, yellow — add red, green or blue into just that family. Add green into reds to push them toward orange. The families are picked by hue, the way the colours look, so “blue” means the same on any camera; the six blend into each other with no gaps, and greys are left alone. COLOUR SMOOTH widens each selection into its neighbours for broader, gentler moves.
• The 3×3 matrix (RED > RED … BLUE > BLUE). The classic RGB mixer, working as labelled: RED > GREEN is how much red feeds the green output. Identity is 1 on the three “same-to-same” controls, and 0 everywhere else. Powerful for channel-swap and colour-geometry looks.
FINISH TOOLS
An ordinary grade at the very end of the chain: FINISH EXPOSURE, CONTRAST, SATURATION, GAMMA, LIFT. They work on the finished display picture, so they feel like a final primary. ENABLE FINISH TOOLS turns all five off at once.
FINISH EXPOSURE is a trim on the finished picture. It is not the exposure the film sees — that is EXPOSURE (STOPS) in TECHNICAL.
SATURATION TOOLS
• SATURATION COMPRESSION eases extreme colour toward a ceiling instead of letting it clip. Useful for neon, LEDs and stage lighting. STRENGTH sets how hard it pulls; KNEE sets where it starts.
• MONOCHROME is black and white, made from the perceived lightness of your colour grade. Every colour decision above still shapes the tones, like shooting black and white through colour filters.
HALATION AND GRAIN
FILM FORMAT is the camera gate, from Super 8 to 4×5 sheet. The same film halates and grains far more on Super 8 than on 35 mm, because the frame is smaller and gets enlarged more.
PHYSICAL SCALE scales the size of everything physical — glow and grain — without changing the format.
Halation
The glow around bright lights. Light passes through the film, reflects off the back of the base, and exposes the film again from behind: first red, then orange. Irradiation is the tighter bloom that scatters inside the emulsion, which every film has.
• HALATION AMOUNT. How much. 1.0 is what the stock physically does.
• ANTIHALATION. How much of the stock’s anti-halation protection is left. Lower it for a visible glow. At 0 you get the CineStill look.
• IRRADIATION. The soft neutral bloom on every highlight edge.
• QUALITY. How finely the glow is computed. Higher is smoother but slower.
• SELF BALANCE. Keeps flat bright areas at their true exposure, so only light from elsewhere shows as glow. Lower it for an overall veil.
HALATION PHYSICS holds the real properties behind the glow — base thickness, refractive index, emulsion depth, scatter, pressure-plate reflection and so on — as multipliers on the stock’s values. Leave these alone unless you want a different kind of film.
Grain
Grain in EMULSION is not noise laid on top. The negative is rebuilt out of dye clouds, sized for your film format and resolution. Strength follows the stock’s measured granularity at each density, so shadows are grainier than highlights, just as on real film. The print then sees the grain exactly as a real print would.
• GRAIN AMOUNT. How strong. 1.0 is the stock as its data sheet measures it.
• GRAIN APERTURE. The aperture the data sheet measured grain through. Higher is grainier, lower is cleaner, at the same size. 48 is the data-sheet default.
• GRAIN SIZE. How big the grain looks.
• PARTICLE SIZE / EDGE SOFTNESS. The shape of each cloud, from tight specks to soft blobs.
• LAYER SEPARATION. 1.0 is real colour negative — colourful specks, each layer independent. 0 is neutral grain.
• GRAIN STRUCTURE. The texture of the rebuilt negative itself. On large formats, where the grain is fine, most of what you see is this structure.
• GRAIN SCALE. Enlarges the grain alone.
• GRAIN REFERENCE. MATCH HD keeps grain looking the same at any timeline resolution. NATIVE PIXELS lets a 4K timeline show finer grain.
• GRAIN IGNORES PHYSICAL SCALE / FILM FORMAT. Unlink the grain from those controls when you want to set it independently.
Grain differs a lot between stocks. At the default settings the finest stocks (F-64D, Eterna) show about a quarter of the grain of the coarsest (Portra 800, UltraMax 400).
OUTPUT
• OUTPUT is the space to hand the picture back in: Rec.709 Gamma 2.4 for a standard SDR timeline, plus sRGB, P3-D65, Rec.2020, HDR (PQ / HLG), DaVinci Intermediate or linear. P3-D65, Rec.2020, PQ, HLG and DaVinci Intermediate keep the film’s colour beyond Rec.709 all the way through the grade.
• GAMUT is what happens to colours the film makes that the output space cannot hold — at the edge of the OUTPUT space you choose. STANDARD ROLL keeps them clean up to the edge. SOFTER ROLL eases saturated reds and cyans in gradually so they do not block up.
• WHITE POINT / BLACK POINT are final output-level trims, applied as the picture is converted to OUTPUT — after the grade, FINISH TOOLS and INTERCOLOUR.
• EXPORT LUT INPUT is only for LUT export. It does not change the picture.
EXPORT BIAS
A simple two-point curve applied to the footage before it enters the film — the same place a Curves node would sit in front of the plugin. FLOOR sets where input black lands; CEILING sets where input white lands. The section lives next to OUTPUT because you reach for it when exporting a LUT; the curve itself is at the top of the chain, so the compensation bakes into the LUT instead of living in a node the LUT cannot carry.
INTERCOLOUR
An extra LUT, applied after FINISH TOOLS and before OUTPUT. It sees the picture the way a Rec.709 gamma 2.4 LUT expects it — exactly like putting a LUT node on the graded print, then converting to delivery. Colour beyond Rec.709 goes round the LUT and is put back after it, so a Rec.709 LUT does not clip it.
EMULSION ships with a large library: Agfa, CineStill, Fuji (including the Fujifilm camera simulations), Ilford, Kodak, Konica, Polaroid, and the INTERCOLOUR look collection. INTENSITY blends the LUT in. SMOOTHNESS softens coarse lattices. Drop your own .cube files into the DELUTS_STOCK folder and press Refresh Stocks.
LOOK GENERATOR
Rolls new looks by blending and varying the looks in the LOOK_GENERATOR folder.
• NEW LOOK / LOOK BACK roll forward or back. SEED is the number of that roll. It is stored with the grade, so a still or a preset comes back the same. Typing or dragging the number does not jump to a look — only the two buttons roll.
• INTENSITY is how strong the look is. VARIATION is how far a roll wanders from its source looks.
• CAST / DYE VARIATION add extra swing on the colour casts or the dyes only.
• STOCK / MEDIUM / PRINT STOCK VARIATION are the chance a roll picks a different film stock, medium or print stock. MEDIUM rolls between PRINT, TECHNICOLOR and TECHNICOLOR 3-STRIP — never SCAN, so a roll cannot throw away the print the look was built on.
• HALATION / GRAIN VARIATION move the character of the glow and the grain — how much, how coloured, how coarse. FILM FORMAT and QUALITY are never rolled, so a roll cannot quietly change the gate or the render time.
• ROLL EXPOSURE. Turn it off to keep your own exposure and roll only the colour.
The generator never changes INTER-IMAGE, the colour mixer, colour management or FADE. Those stay where you set them.
PRESETS and EXPORT LUT
PRESETS save and load every setting.
• Save As Look writes the current grade into PRESET LOOKS.
• Save As Look No CST leaves out GAMUT, GAMMA and OUTPUT, so the look works on any camera. This is the best way to save looks you will reuse across cameras.
EXPORT LUT bakes the colour grade into a .cube (33³ or 65³), or into DELUTS stock formats.
• Halation, grain and edge effect stay live in the plugin. They work across neighbouring pixels, so they are applied on top rather than baked into the LUT.
• Set EXPORT LUT INPUT to the space the LUT will be fed. DaVinci Wide Gamut / DaVinci Intermediate is a good shared choice, so one LUT serves any camera converted into it.
• Nothing goes after the LUT. Its output is already a finished display picture. Putting another display transform after it renders twice and comes out dark.
GRADING WITH EMULSION
Film grading has a logic of its own. If you are used to lift / gamma / gain, the lab way of thinking is worth learning.
1. Get the input right. Correct GAMUT and GAMMA are the foundation. Everything downstream assumes true scene light.
2. Choose the film before you grade it. The stock defines the palette, the contrast and the texture. Try a few stocks on your shot before touching anything else. Use FADE, or VIEW → BYPASS + DISPLAY ROLL-OFF, to compare against the original.
3. Expose the negative, then print it. These are two different decisions.
• EXPOSURE decides what the film does: density, colour richness, grain, how highlights roll.
• PRINT EXPOSURE decides how bright the result is.
A slightly over-exposed negative printed down is the classic rich, fine-grained cinema look. An under-exposed negative printed up gives thin blacks, more grain and a gritty feel.
4. Balance like a lab. Use BALANCE R/G/B (printer points) and TEMPERATURE / TINT (printer lamp) to neutralise or tint. They move colour through the whole tonal range together, which is what makes film balance look natural. On a colour negative, SCENE LIGHT is only the bake reference — it will not warm or cool the picture the way a filter would. On TECHNICOLOR 3-STRIP, use SCENE LIGHT as the light on set.
5. Shape contrast at its source. In order of how filmic they feel: your choice of print stock, then PRINT CONTRAST, then HIGHLIGHT LATITUDE for bright exteriors, then PUSH / PULL, then PRINT TOE for saturated colours, and only then the roll-off / recovery tools and FINISH CONTRAST.
6. Add colour in the film first. INTER-IMAGE (leave at 1), PUNCH, FILM DENSITY and SATURATION build colour the way film does. Reach for SAUCE, the tone bands and the COLOUR MIXER when you want a look, not just more colour.
7. Texture last. Halation and grain carry a lot of the “shot on film” feeling. Set FILM FORMAT to match the look you want — Super 16 grain is very different from 35 mm — before fine-tuning amounts.
8. Trim, don’t fight. FINISH TOOLS are for small final corrections. If you are pushing them hard, go back up the chain. The film usually has a better answer.
WHY EMULSION
• Real film, computed. A genuine negative-and-print model built from manufacturer data. It is not a LUT or a set of tuned curves, so it responds to exposure, light and processing the way film does.
• Calibrated to real negatives. The core stocks are fitted to real negatives of a colour chart, shot on that film and scanned.
• 25 negative stocks, 3 print stocks. Kodak Vision3, Portra, Ektar, Gold and UltraMax. Fujifilm Eterna, Reala, F-64D, Superia and Pro 400H. Agfa Vista and Ultra. Printed on Kodak 2383, 2393 or Fuji 3521XD — or scanned.
• Technicolor, two ways. Print any negative the dye-transfer way, or shoot through the classic three-strip camera.
• The lab in a node. Push and pull, printer lights, print contrast, bleach bypass, dye fade and projector flare.
• Physical halation and grain. Computed inside the film from its real properties, scaled to your format, from Super 8 to 65 mm and 4×5.
• Wide gamut, end to end. The film and every grade tool keep your camera’s full colour. Deliver in DaVinci Wide Gamut, P3, Rec.2020 or HDR without losing it.
• A complete grading toolkit. Creative looks, per-band colour, a colour mixer, finishing tools and saturation control, all in the same node — rebuilt for wide gamut.
• Built for real workflows. Every major camera log. HDR and SDR outputs. Film-print highlights that hold detail like a modern camera transform. LUT export, presets, looks, and a look generator.
• Since 2015. DELUTS has been making colour tools for Resolve for more than a decade. EMULSION is the film model that work was building toward.
///
DELUTS FILM GATE II v1.1 — USER GUIDE
A real film gate, built in millimetres, inside DaVinci Resolve.
Most film-frame effects are a picture of a frame: a scanned border laid over your shot. FILM GATE II builds the film itself. Every format starts from its real dimensions — the width of the stock, the camera aperture, the size, shape, pitch and position of every perforation — so the gate, the holes and the frames above and below all belong to one physical strip of film.
Change the format and the whole strip changes with it. Standard 8, Super 8, 16mm, 35mm, 65mm, IMAX, a Kodachrome slide. Then every part of it is yours to adjust: accurate base, creative override.
This guide is for anyone considering FILM GATE II, and for anyone already using it. If you are on the free version of DaVinci Resolve, it also explains why Studio is the step that unlocks these tools.
NEW IN FILM GATE II
• Rebuilt from the ground up. The original FILM GATE began as a DCTL. FILM GATE II is a new plugin, drawn from real millimetre geometry for every format rather than from pictures of a frame.
• Eighteen formats. From Standard 8 to IMAX 15-perf, plus 16mm Sound Print, a Kodachrome slide mount and PORTRAIT FILM, an imagined vertical gauge for 9:16.
• Negative or print. STOCK turns the same format into a dark camera negative or a clear release print, with the printed black band, ink edge print and cyan dye soundtrack a real print carries.
• Optical sound from your own audio. Drop a .wav into the DELUTS_STOCK/AUDIO folder and it prints down the film edge as a real variable-area track — printed ahead of the picture, as on a real print.
• KEYKODE that counts. The real Kodak edge print: key number, barcode, manufacturing line and frame marks. The footage number goes up every foot of film as the shot runs, and the barcode is genuinely encoded.
• Digital sound and edge dye bars. Dolby Digital blocks between the perforations, SDDS down the extreme edges, and two coloured edge stripes.
• SOURCE ASPECT. Put a 16:9 clip into a 9:16 sequence and the gate takes just the picture, at full resolution — no shrinking it in the edit page and blowing it back up.
• Negative flash. Turn the picture into a colour negative, orange mask and all.
• Presets remember your sound file by name, so a shared preset prints the same audio on every machine that has it.
WHY THIS IS NOT AN OVERLAY
An overlay is one picture of one gate. It cannot change gauge. Its perforations do not know where the frame line is. It cannot show the next frame at the right distance, weave independently of the picture, or count its own footage.
FILM GATE II starts from the film:
1. FORMAT sets the stock width, the camera aperture and the perforations, in millimetres, from published format data.
2. Perforations are placed from the film edge, the way a perforator punches them. The aperture sits where the camera puts it.
3. Your picture is fitted into the aperture. The frames above and below follow at the real frame pitch.
4. STOCK decides what light does: a dark negative with glowing holes, or a clear print with a black printed band.
5. Everything printed on the film — sound track, edge print, KEYKODE, digital sound — rides the film, not the screen.
6. Then the film moves: gate weave, perforation weave, projector slip, flicker, dust and ghosting.
What that means in practice:
• One click gives the right format. Choosing a format writes the correct geometry, the sound track and the edge print together, so you start from a real strip, not something to fight with.
• It scales to any sequence. MASTER FILM SCALE zooms the whole strip as one piece. The gate, holes, frames and marks stay locked together at any resolution and on 16:9, 9:16, 1:1 or scope.
• The details are real. Super 8 and 35mm perforate differently. A 35mm print carries its sound 21 frames ahead of the picture. A key number advances once a foot. Small things, but they are what stop it reading as a graphic.
WHO IT IS FOR
• The purist, who wants an accurate representation of a particular film format.
• The creative user, working on a 16:9 or 9:16 sequence, who wants to exaggerate or reinterpret the look of physical film — a stack of 35mm frames in a vertical post, an IMAX strip, a slide on a light box.
• The editor, who simply wants a digital clip to look convincingly like Super 8, 16mm or 35mm and drop it into the cut.
• Anyone on free DaVinci Resolve who is deciding whether Studio is worth it. Third-party OpenFX plugins are a Studio feature.
HOW THE FILM IS BUILT
Knowing the layers explains nearly everything about how the controls behave. From your picture outward:
1. Your footage — SOURCE ASPECT, fit, scale and position inside the aperture
2. Flicker — the projector lamp walking in brightness and colour
3. Negative flash (optional) — the picture turned into a colour negative
4. Dust, dirt, hair and damage — on the picture, inside the gate
5. The gate — the aperture shape, its softness, and the dirt caught in it
6. The stock — film base, perforations, cut edge and ghosting; on a print, the printed band round the picture
7. Marks printed on the film — optical sound, 8mm film text, KEYKODE, edge dye bars, digital sound
8. How you see it — VIEW, MASTER FILM SCALE, MASTER FILM ROTATE, EXTEND FILM BASE
Movement is not a layer; it is what moves with what, exactly as in a real projector:
• GATE WEAVE moves the picture and the gate against the stock — a registration error between the frame and the gate.
• PERF WEAVE moves the perforations against the film, independently and never in step with the gate weave.
• PROJECTOR / TELECINE SLIP moves the entire strip — picture, gate, perforations, dirt and all.
The key idea: the preset is not a locked look. FORMAT gives you the physically correct starting point. After that you can deliberately break the rules — take the perforations off Super 8, widen its gate, show three frames at once, add heavy damage and projector slip.
QUICK START
1. Place it. Put FILM GATE II on a node at the end of your tree, after the grade. A fresh node loads as SUPER 8, framed to the film width, with optical sound and the edge print on.
2. FORMAT. Choose the gauge. Everything — gate, perforations, pitch, track and edge print — is set for you.
3. STOCK. CAMERA NEGATIVE for a dark strip with glowing perforations. POSITIVE RELEASE PRINT for clear stock with the picture printed on it.
4. Frame it. VIEW FIT FILM WIDTH shows the whole strip edge to edge. COVER GATE fills the sequence with picture. Then use MASTER FILM SCALE: below 1 reveals the frames above and below, above 1 moves in on the gate.
5. IMAGE. If your picture is letterboxed inside the frame — a 16:9 clip on a 9:16 timeline — set SOURCE ASPECT to the clip’s real aspect. Otherwise leave it on AUTO.
6. OPTICAL SOUND. Set PROJECT FPS to your timeline frame rate, or the track drifts.
7. Play it. Weave, dust, flicker and ghosting all move. Judge them in playback, not on a still.
That is a complete film gate. Everything else is refinement.
SETTING UP IN RESOLVE
Where to put it. FILM GATE II is the physical film around a finished picture, so it goes last: after your grade, and after EMULSION if you use it. Grain and halation belong to the picture; the gate, perforations and edge print belong to the strip that carries it.
It works on the display picture. The film base, perforation light and printed marks are drawn as finished display values — the film as you would see it on a light box or a projection screen. It looks as designed on a Rec.709 timeline, or after EMULSION, whose output is already a finished picture.
Portrait and square sequences. Choose the sequence shape in Resolve, then frame the film with VIEW and MASTER FILM SCALE. For 9:16, try PORTRAIT FILM, or any 35mm or 65mm format with MASTER FILM SCALE pulled back to show several frames stacked up the screen.
Clips that do not fill the frame. Leave the clip full size in the edit page and set SOURCE ASPECT in IMAGE to what the clip really is. The gate takes only that picture, at full source resolution.
Timeline frame rate. OPTICAL SOUND needs PROJECT FPS set to your timeline rate. The sound track, KEYKODE count, weave and dust all follow the timeline frame, so a shot plays back the same every time.
Your own audio. Put .wav files in Resolve’s LUT folder under DELUTS_STOCK/AUDIO — subfolders are fine — and press REFRESH AUDIO. No restart needed.
Coming from the original FILM GATE. FILM GATE II is a new plugin, not an update of FILM GATE v1.0, so existing nodes are not converted. On a timeline graded with the original, add FILM GATE II in its place.
Trying before you buy. Until a serial is activated, FILM GATE II runs as a demo with a watermark. The picture is the real picture. Activate under LICENSE when you are ready.
THE CONTROLS
FILM GATE II
ENABLE turns the whole effect on and off. Off is a straight pass-through.
FORMAT is the physical starting point. It writes the film width, the gate, the perforations, the pitch, the alignment, the perforation shape and the gap to the gate — and places the optical track and edge print for that gauge. Every one of those values then stays live in GEOMETRY and the other sections, so you can change anything afterwards. Choosing FORMAT again resets them to that format.
• 8MM — STANDARD 8 (Regular 8: 16mm film slit down the middle, large perforations on the frame line) · SUPER 8 (the home-movie format: small perforations, a bigger frame) · KODAK EXTENDED SUPER 8 (Kodak’s widened 6.30 × 4.20 mm gate, reclaiming the old stripe area for picture)
• 16MM — 16MM STANDARD (double perforation) · SUPER 16 (single perforation, the picture widened into the soundtrack area) · ULTRA 16 (widened right up to the perforations on both sides) · 16MM SOUND PRINT (single perforation with a full optical track opposite)
• 35MM — 35MM ACADEMY 4-PERF (the classic sound-print frame, with its optical track) · 35MM ANAMORPHIC 4-PERF (the 2× squeezed scope negative) · SUPER 35 4-PERF (full aperture) · SUPER 35 3-PERF (near 16:9) · TECHNISCOPE 2-PERF (classic 2-perf scope) · SUPER 35 2-PERF (the modern full-width 2-perf) · VISTAVISION 8-PERF (35mm running sideways)
• LARGE FORMAT — 65MM 5-PERF (the 65mm camera negative) · IMAX 15-PERF 65MM (65mm running sideways, fifteen perforations a frame)
• SPECIAL — KODACHROME TRANSPARENCY – 35MM SLIDE MOUNT (a single 2in card slide instead of a strip; see SLIDE MOUNT) · PORTRAIT FILM (an imagined vertical gauge for 9:16; see below)
PORTRAIT FILM is Super 8 turned on its side. The same stock and the same perforations, but the film runs across the sequence, so the frame stands upright: perforations along the bottom edge, optical track along the top. The aperture keeps the gauge’s own proportion rather than being forced to 9:16 — a 9:16 aperture would fill a portrait sequence with neighbouring frames instead of picture. Use it with VIEW FIT FILM WIDTH.
Which formats print an optical sound track when you choose them:
• On — 35mm Academy and Anamorphic (the classic optical release print), 16MM SOUND PRINT, and the three 8mm gauges (for the look — real Regular 8 sound was a magnetic stripe).
• Off — 16mm Standard and Ultra 16 (the second row of perforations takes the track area), Super 16 (the picture takes it), Super 35, Techniscope and VistaVision (camera negatives), 65mm (70mm prints carried magnetic sound) and IMAX (sound ran on a separate system).
Formats that start with it off still have the track placed and ready; switch it on in OPTICAL SOUND. The 8MM FILM TEXT edge print is on for the 8mm gauges.
STOCK decides what the light does with the geometry. Any format can be struck as a print.
• CAMERA NEGATIVE — a dark strip. The perforations are the only clear things on it, so they glow and throw a warm corona. The edge print glows too.
• POSITIVE RELEASE PRINT — near-clear stock. The picture sits in a black printed band, the edge print is dark ink, and the sound track’s dense areas turn cyan dye, as on a modern print. The perforations read by their cut edge, not by brightness, and ghosting goes, because clear film has nothing to pipe light through.
Like FORMAT, STOCK writes values rather than locking a look, so you can take the print and put the negative’s warm edge print back on it.
VIEW is how the film is framed in your sequence.
• FIT GATE — the whole aperture fits the sequence.
• COVER GATE — the aperture fills the sequence.
• FIT FILM WIDTH — the physical stock, edge to edge (the default).
MASTER FILM SCALE zooms the whole film system together: gate, base, perforations, marks, dirt and neighbouring frames. Below 1 reveals more of the strip — just the edge of a perforation, the full film width, or several complete frames above and below, each repeating your picture at the real frame pitch. Above 1 moves in until no perforations are visible.
MASTER FILM ROTATE tilts the whole strip as one rigid piece, in degrees, so nothing drifts out of register. A large angle can swing the film edges into shot; pull MASTER FILM SCALE back or turn on EXTEND FILM BASE to cover them. The slide mount has its own rotation.
EXTEND FILM BASE fills the sequence outside the stock with the film-base colour. Off, the strip sits on black.
IMAGE
How your picture sits inside the gate. It always keeps its aspect; nothing is ever squashed.
• FIT IMAGE TO GATE — on, the picture covers the aperture and the overflow is cropped (a 16:9 shot in a Super 8 gate loses a little each side). Off, the whole picture fits inside the aperture and may letterbox.
• SOURCE ASPECT — the aspect of the picture inside the incoming frame, for when the two differ. AUTO – WHOLE FRAME uses the whole frame. 2.39:1, 2.20:1, 1.85:1, 16:9, 3:2, 4:3, 1:1 and 9:16 take only the centred region of that shape. CUSTOM uses CUSTOM ASPECT (width divided by height). It is a crop, never a stretch, and it applies to the slide mount too.
• IMAGE SCALE — extra zoom of the picture inside the gate, on top of the fit.
• IMAGE POSITION X / Y — move the picture inside the gate. These are independent of MASTER FILM SCALE.
SLIDE MOUNT
Only used by the KODACHROME TRANSPARENCY format. Instead of a strip of film you get a single 2in card mount with your picture behind its 35mm aperture — a slide on a light box.
• BACKGROUND — BLACK or WHITE are solid. FLOATING leaves the surround transparent, with the mount’s drop shadow, so the slide composites over whatever sits below it on the timeline.
• MOUNT SIZE — how much of the shorter side of the sequence the card fills. MASTER FILM SCALE multiplies it.
• MOUNT POSITION X / Y, MOUNT ROTATION — move and tilt card, picture and shadow together.
The shadow is part of the mount artwork and needs no control. IMAGE, FLICKER and DUST DIRT HAIR DAMAGE still apply inside the aperture. Perforations, film base, weave and slip do not — a mounted slide has none of them.
GEOMETRY
The live millimetre dimensions. FORMAT fills them in; then you can break the rules.
• FILM WIDTH mm — the width of the stock.
• GATE WIDTH / HEIGHT mm — the camera aperture.
• GATE RADIUS mm — the corner radius of the aperture.
• GATE OFFSET mm — slides the gate across the stock.
• PERF WIDTH / HEIGHT / RADIUS mm — the size and corner radius of each perforation.
• PERF PITCH mm — perforation centre to centre. PERFS PER FRAME — how many pitches make one frame: 4 on standard 35mm, 3 and 2 on the smaller pull-downs, 8 on VistaVision, 15 on IMAX.
• PERF SIDES — single row on the left / bottom, single row on the right / top, or both.
• ORIENTATION — VERTICAL runs the film up the sequence; HORIZONTAL runs it sideways, as VistaVision and IMAX do.
• PERF TO EDGE mm — from the film edge to the outer edge of the perforation. This belongs to the stock, not the aperture, so 35mm Academy and Super 35 perforate identically.
• PERF TO GATE mm — the gap between the perforations and the gate, on single-perforation formats. On double-perforation formats the gate is placed by GATE OFFSET, as on real film.
• PERF INSET / PERF VERTICAL mm — creative nudges across and along the film.
• PERF ALIGN — FRAME CENTRE (Super 8, and 3, 5 and 15-perf) or FRAME LINE (Standard 8, 16mm, and 2, 4 and 8-perf, where the frame line falls between holes).
• PERF SHAPE — TYPE S (Super 8), TYPE R (Regular 8 and 16mm), BH (35mm camera), KS, DH and CS (print and scope holes). AUTO follows FORMAT.
FILM BASE
The stock outside the gate. The default is the dark base of a camera negative.
• BASE R / G / B — the colour of the base. 0 is black.
• BASE TEXTURE — density variation in the stock.
• CUT EDGE — the double cut edge of the stock, with light catching the punched plastic.
GATE
The shape of the aperture itself. A real gate is not a perfect rectangle.
• PRECISION GATE — on, a clean rounded rectangle. Off, a slightly organic, irregular edge.
• GATE EDGE SOFTNESS — the feather of the gate edge.
• GATE DIRT ENABLE / AMOUNT / SCALE / SEED — dirt caught in the gate, carved into the silhouette of the aperture rather than laid over the picture. AMOUNT is how far it bites in; SCALE its size along the edge; SEED picks a different pattern. It follows the perimeter of any gate, from 8mm to 65mm.
PERFORATIONS
The sprocket holes. Each layer can be set on its own.
• ENABLE — draw the perforations.
• PERF LIGHT — the light coming through the holes. 0 is a black hole; the corona still shows.
• COLOUR R / G / B — the colour of that light. Warm by default, like a projector lamp.
• PERF EDGE — the irregular cut edge of each hole.
• EDGE RAY — light dancing on the rough cut edge.
• PUNCH THICKNESS — the bright rim that follows the edge of the hole exactly.
• BLEED / CORONA — the glow around each hole. Independent of PERF LIGHT, so a black hole can still glow.
• PERF DIRT ENABLE / AMOUNT — dirt on the perforation edges.
PERFORATION GHOSTING
Light contamination travelling between and around the perforations: soft red, deep orange, golden and amber shapes that drift, breathe and disappear rather than sitting locked to the film.
• AMOUNT — how strong the ghosting is. COLOUR R / G / B — its colour.
• INTO FRAME — how far it travels from the holes. 0 stays by the perforations; 1–2 crosses the gate into the picture.
• VERTICAL OFFSET — slides it along the film, in perforation pitches. VERTICAL SPREAD — how far it smears along the film.
• ASYMMETRY — breaks the mirroring so it reads as a reflection, not a copy.
• EVOLVE SPEED — how fast it changes. 0 freezes it. SEED — a different pattern.
DUST DIRT HAIR DAMAGE
Real scanned dirt, hair, scratches and cracking, played as a moving sequence over the picture inside the gate. It works on 16:9 and 9:16 alike and never stretches.
• AMOUNT — how much of the dirt you keep: 0 is clean, 1 is everything. AMOUNT SOFTNESS turns that selection into organic clouds. MIX and OPACITY set the overall strength.
• BLEND MODE — MULTIPLY darkens (classic black dirt). SCREEN lightens.
• WHITE / BLACK — light dirt on a dark plate, or dark dirt on a light one.
• CONTRAST and SOFTNESS — push or soften the dirt. EMBOSS and EMBOSS ANGLE give it relief, as if it sat in the emulsion.
• FIT, SCALE, POSITION X / Y — how the dirt plate sits in the gate.
• SPEED, LOOP IN / OUT, FRAME OFFSET, LOOP MODE (LOOP, PING-PONG, HOLD) and SEED — how the sequence plays. Change SEED or FRAME OFFSET on each shot so neighbouring clips never share the same dirt.
OPTICAL SOUND
A sound track printed down the film edge, driven by a real audio file. On a real print the sound is photographed onto the film beside the picture; FILM GATE II does the same with your .wav.
• SOUND FILE — every .wav in Resolve’s LUT folder under DELUTS_STOCK/AUDIO, subfolders included (a file in LOCKED SOUND/JOB_A shows as LOCKED SOUND › JOB_A › JOB_A.wav). The installer supplies Song_A.wav as the default. BUILT-IN TONE is a short loop that is always there. Mono or stereo, 8 to 32-bit or float, up to 15 minutes.
• REFRESH AUDIO — rescans the folder after you add files. No restart.
• TRACK TYPE — UNILATERAL (one modulated edge), BILATERAL (a symmetrical wedge), DUAL BILATERAL (the twinned pattern on most release prints, the default) or VARIABLE DENSITY (the older grey-scale track).
• PROJECT FPS — your timeline frame rate. Set it, or the track drifts.
• ADVANCE FRAMES — a real print carries its sound ahead of the picture so it reaches the sound head first: 21 frames on 35mm, 26 on 16MM SOUND PRINT, 18 on the 8mm gauges. FORMAT sets it. 0 locks the track to its own frame.
• SYNC OFFSET — extra frames on top, to line the waveform up with a moment in the shot.
• LEVEL — the loudness of the track. Above 1 it clips against the track edge, like an over-modulated print. QUIET FLOOR keeps a thin line through silence.
• DETAIL, SOFTNESS, BLOOM — fine waveform detail, the optical softness of the printed edge, and the glow of the lamp through the clear areas.
• NEGATIVE TRACK — off, a clear track lit from behind (a print). On, a dark track on clear film (a negative).
• LIGHT R / G / B, OPACITY — the colour and strength of the track.
• FORMAT PLACEMENT — on, the format puts the track in its real position and width. Off, set TRACK POSITION mm and TRACK WIDTH mm yourself.
• DYE TRACK and DYE R / G / B — colour the dense part of the track. 0 is the old silver track. 1 is the cyan dye track modern prints carry; POSITIVE RELEASE PRINT sets it for you.
PROJECTOR / TELECINE SLIP
The whole film slipping in the projector or scanner: picture, gate, perforations, frame lines and dirt all walk together. Off by default.
• AMOUNT — how far the strip walks. SPEED — how quickly. RANDOMNESS — how irregular.
8MM FILM TEXT
The Kodachrome edge print that runs along 8mm film, repeating as the film travels. On by default for the 8mm gauges.
• OPACITY and BLEND — PRINT LIGHT glows over a dark base; INK darkens toward the colour, for light stock.
• COLOUR R / G / B — the colour of the print.
• FLIP — mirrors it so it reads the right way. BLUR — softens it, as if just off the scanner’s focus.
• SCALE, POSITION X / Y mm — size and placement on the film.
• REPEAT FRAMES — how often it repeats. TRAVEL SPEED — how fast it moves; 1 is real film transport.
RELEASE PRINT
Only drawn when STOCK is POSITIVE RELEASE PRINT. A print is struck through a printer aperture: the band it covers goes black except where the picture held light back, and everything outside it stays clear. So the black frame line and the black margins beside the picture are not separate elements — they are the printed band with no picture in it, which is why there is no frame-line control.
• APERTURE WIDTH / OFFSET mm — the width and position of the printed band. The format sets it between the perforation rows, so the sound track sits inside it and the holes stay clear.
• PRINT DENSITY — how deep the black is. Below 1 it goes milky, like an old or under-printed copy.
• DMAX R / G / B — the colour of that black. Print black is never quite neutral.
• APERTURE EDGE mm — the softness of the printed edge.
The printed band moves with the gate weave, because on a print the picture and its surround are the same piece of film.
EDGE PRINT / KEYKODE
The real Kodak edge print of 16mm, 35mm and 65mm film — not a picture of one. Off by default; the format places it on the edge away from the sound track.
The key number counts. It goes up by one every foot of film, so the footage number advances as the shot runs — and that, more than the lettering, is what stops it reading as a graphic. The barcode is genuinely encoded from the digits printed beside it, checksum included.
• FILM STOCK — sets the two-letter identification code and the product code: Vision3 500T, 200T, 250D and 50D, Double-X, Vision 500T, EXR 50D, Vision Print 2383, the intermediate and separation stocks, and the 16mm Vision3 stocks.
• KEY NUMBER, BARCODE, MID-FOOT REPEAT, MANUFACTURING INFO, FRAME INDEX, ZERO-FRAME DOT — switch each part of the print on or off.
• YEAR CODE, PREFIX, START COUNT — the key number itself. START COUNT is the footage at frame 0.
• BARCODE MFG ID, BARCODE FILM TYPE, EMULSION, ROLL / PART, STRIP, PRINTER, YEAR MANUFACTURED — the rest of the line, as on real stock.
• DATE SYMBOL 1 / 2 — Kodak’s pre-1950 year symbols (half disc, dash, angle, plus, diamond, circle, triangle). Two together name a year.
• POSITION mm, PRINT HEIGHT mm, LETTER SPACING, FILM OFFSET mm — placement and size.
• TRAVEL SPEED, FLIP, OPACITY, BLEND, COLOUR R / G / B — as in 8MM FILM TEXT.
• EDGE SOFTNESS — edge print is a contact-printed latent image, not vector art, so a little softness is right. It softens the barcode too; turned right up, the barcode stops scanning, just like the real thing after a few generations.
EDGE DYE BAR and EDGE DYE BAR II
Two solid dye stripes down the film edge, identical apart from where they sit. The first sits hard against the edge opposite the KEYKODE; the second sits just inboard of it. Their colour follows STOCK: cyan on a print, its deep red-orange complement on a negative. Give the second bar its own colour to see them as two stripes.
• ENABLE, POSITION mm, WIDTH mm, AMOUNT, COLOUR R / G / B, EDGE SOFTNESS mm.
DIGITAL SOUND
The digital sound systems a 35mm release print carries alongside the analogue track. Real prints carried them all at once, which is why a late-90s print edge is so busy.
• DOLBY DIGITAL — a data block between every pair of perforations, on the row nearest the analogue track. DD OPACITY, POSITION, WIDTH, HEIGHT, DATA GRID and SOFTNESS shape it.
• SDDS — a fine data strip down the extreme film edge, outside the perforations. SDDS BOTH EDGES prints it on both sides, as real SDDS did. SDDS OPACITY, POSITION, WIDTH, DATA GRID and SOFTNESS shape it.
• DATA SEED — a different pattern.
The data looks like data and changes frame by frame with the film, which is what makes it read as real. It does not decode — it would be compressed audio on a real print. It shares the KEYKODE colour and blend, so it flips with STOCK. SDDS, the dye bars and KEYKODE all want the film edge; real 35mm ran out of edge too. Arrange them to taste.
GATE WEAVE
The picture moving against the gate: mechanical registration, with smooth, natural acceleration rather than random jumps. On by default at a gentle setting.
• WEAVE AMOUNT X / Y — how far it moves across and along. WEAVE SPEED — how quickly. WEAVE RANDOMNESS — adds a less regular layer.
• REGISTRATION — high is a tight, well-maintained camera; low is deliberately unstable.
• EDGE PRINT MOVES — whether KEYKODE and the dye bars move: NOT AT ALL, WITH GATE WEAVE (tied to the picture), or WITH PERF WEAVE (the physically true one — they are printed on the stock, like the perforations).
PERF WEAVE
Small, independent movement of the perforations against the film, never in step with the gate weave. WEAVE AMOUNT X / Y, WEAVE SPEED and WEAVE RANDOMNESS, as above.
FLICKER
Projector and telecine flicker — a playback characteristic rather than something in the negative, and one of the strongest cues of old film. Off by default.
• FLICKER AMOUNT — how much the brightness walks. FLICKER SPEED — how fast.
• IRREGULARITY — pops and holds, so it never reads as a smooth pulse.
• EXPOSURE FLICKER — how much of the flicker is exposure. TEMPERATURE VAR — a warm / cool wander with it.
NEGATIVE FLASH
Turns the picture into a colour negative for a flash of the raw neg — a camera roll on a light box, a scan before inversion.
• INVERT TO NEGATIVE — on / off. NEGATIVE GAMMA — the contrast of the negative; camera stock sits near 0.6, 1.0 is a straight inversion.
• ORANGE MASK and MASK R / G / B — the strength and colour of the orange coupler mask.
• MASK FLOOR — the clearest part of a real negative still carries mask, so nothing reaches black. This is what makes it look like film rather than a filter.
• TINT FILM BASE — carries the mask onto the film base, so the whole strip goes orange, as a real negative does. REBATE BRIGHTNESS sets how bright it sits.
Dust and hair land on top of the mask, not inverted with the picture, because they sit on the film.
PRESETS
Presets save and load every setting, including the sound file, which is remembered by name. If a preset names a .wav this machine does not have, it falls back to BUILT-IN TONE and says so.
• Preset / Load Preset / Save Preset — pick, load, or save the current node under Preset Name.
• Refresh and Open Folder — rescan and open the preset folder.
• Copy Params / Paste Params — copy every setting from one node to another.
• Set Defaults — return every control to the factory setting.
Starter presets install with the plugin:
• KODAK SUPER 8 — Extended Super 8 negative with the Kodachrome edge text, optical sound and dust.
• KODAK SUPER 8 EDGE — the same with a KEYKODE edge print in place of the text.
• KODAK SUPER 8 EDGE BAR — adds the edge dye bars.
• KODAK SUPER 8 PRINT — struck as a release print, with SDDS and dye bars.
• KODAK SUPER 8 EXTRA PRINT DD — the print with Dolby Digital as well.
• 35mm 4 PERF PRINT — a 35mm Academy release print: optical sound, KEYKODE, SDDS and dye bars.
• 65mm 15 PERF IMAX PRINT — an IMAX print edge: KEYKODE, Dolby Digital, SDDS and dye bars.
WORKING WITH FILM GATE II
A few starting points. Each is a format, a stock and a handful of moves.
Super 8 home movie in a 16:9 edit. SUPER 8 or KODAK EXTENDED SUPER 8, CAMERA NEGATIVE, VIEW COVER GATE. Turn on FLICKER, raise GATE WEAVE a little, and leave the dust on. Push MASTER FILM SCALE just past the point where the perforations leave the frame for a gate with no strip; pull it back to let one row of holes in.
A vertical post of stacked frames. On a 9:16 sequence, choose a 35mm or 65mm format, VIEW FIT FILM WIDTH, and pull MASTER FILM SCALE down until three or four frames stack up the screen. Or choose PORTRAIT FILM for one upright frame that fills the screen. Set SOURCE ASPECT to your clip’s real shape.
A 35mm release print. 35MM ACADEMY 4-PERF, POSITIVE RELEASE PRINT, OPTICAL SOUND on with your own .wav and PROJECT FPS set. Add KEYKODE, SDDS or Dolby Digital to taste — or load the 35mm 4 PERF PRINT preset.
Dirty archival 8mm. STANDARD 8, PRECISION GATE off, GATE DIRT up, DUST AMOUNT up with some EMBOSS, FLICKER on with high IRREGULARITY, REGISTRATION down. Add a touch of PROJECTOR / TELECINE SLIP.
A slide on a light box. KODACHROME TRANSPARENCY, BACKGROUND WHITE, a small MOUNT ROTATION. Or FLOATING, to lay the slide over another layer on the timeline.
Subtle professional instability. Any 35mm format, COVER GATE, MASTER FILM SCALE up until only picture shows, GATE WEAVE low with REGISTRATION high, dust very low. It should feel like very good film registration, not an effect.
A flash of the negative. Turn on NEGATIVE FLASH with TINT FILM BASE for a cut or two — the camera roll seen before it was printed.
WHY FILM GATE II
• Real film geometry. Built from published millimetre dimensions for every format, not from pictures of a frame. Gate, perforations, pitch and neighbouring frames all come from one physical strip.
• Eighteen formats. Standard 8 to IMAX 15-perf, 16mm Sound Print, a Kodachrome slide mount and a vertical PORTRAIT FILM for 9:16.
• Accurate base, creative override. Presets start you right; every control stays yours.
• Negative or print. One switch between a camera negative and a release print, with the right base, black band, ink and dye track.
• Sound you can see. Your own audio printed as an optical track, with real sound advance; Dolby Digital and SDDS alongside.
• A KEYKODE that counts, with a genuinely encoded barcode.
• Movement that behaves. Gate weave, perforation weave and projector slip kept separate, the way a real transport moves.
• Real dirt. Scanned dust, hair, scratches and cracks, plus dirt caught in the gate and the perforations.
• Any sequence. 16:9, 9:16, 1:1 or scope, at any resolution, with SOURCE ASPECT for pictures that do not fill the frame
LICENCE AND SUPPORT
Paste your serial under LICENSE at the bottom of the panel and click Activate. A product serial unlocks EMULSION on this machine. A bundle serial unlocks every DELUTS plugin. Deactivate removes the key so you can move it.
SCREEN LABELS is free and needs no serial.
deluts.com
Note: dctl archive will remain here for users of dctls to download products again.
More products